This is where school can define the number of installments in which school fee to be received, eg. Quarter 1, Term1, Ist Installment. You can configure start & due dates along with pro-rata fee installments. This allows you to configure multiple installments for same or different-2 classes.
How to create Fee Schedule?
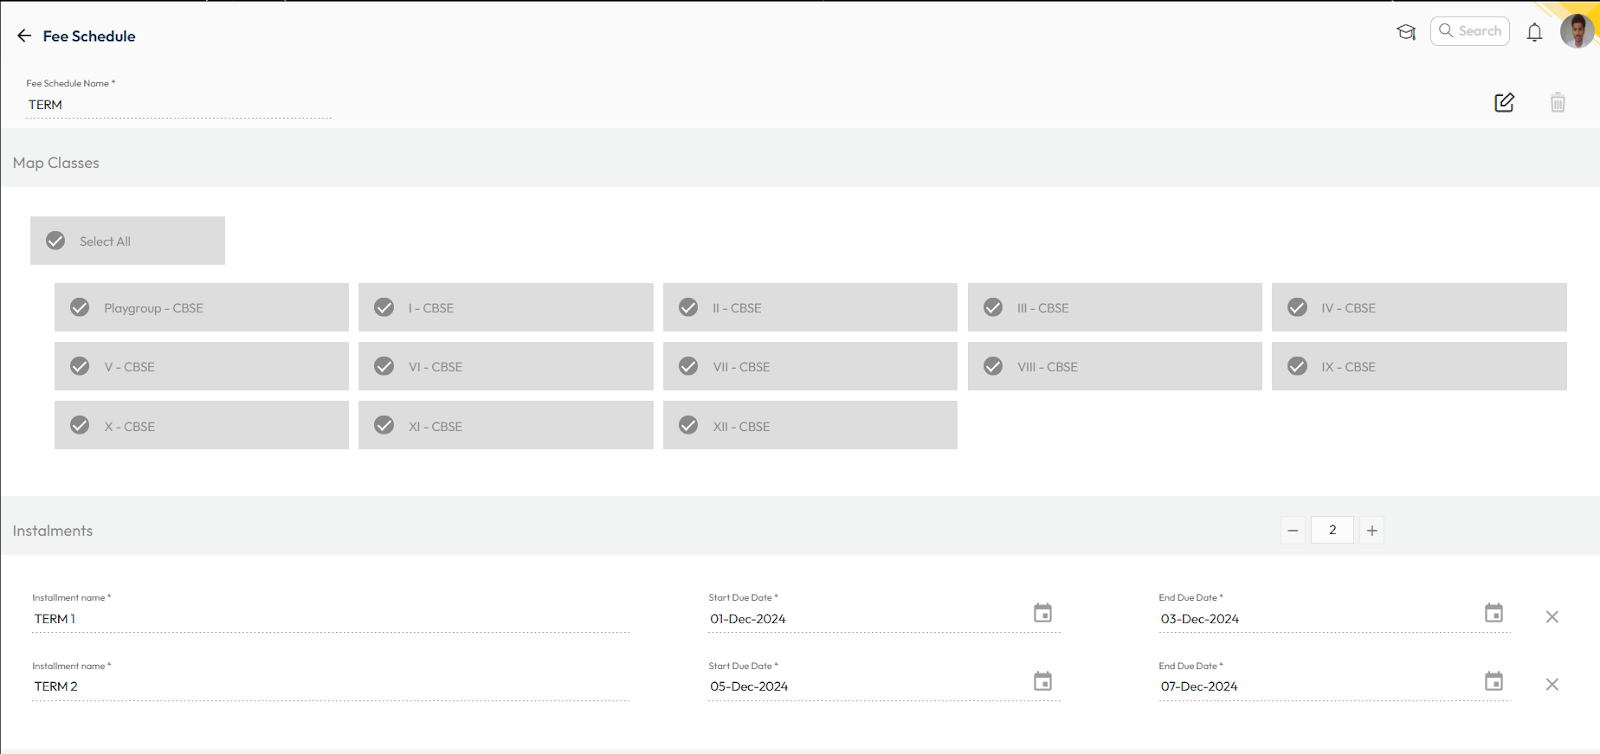
- Navigate to Settings > Finance > Fee > Fee Schedule.
- Click the Add (+) button to open the schedule creation page.
- Defining Fee Schedule Details
- Schedule Name: Provide a clear name to schedule to identify (e.g., “Monthly, Quartely, Half Yearly etc.)
- Applicable Class: Select the class or classes to which this schedule applies.
- Installments: Specify the number of installments for the fee schedule, this should be as per the schedule name you have given.
- Installment Name: Specify the installment name (e.g., “April, May, Quarter 1 or 2 etc.”).
- Start Date: On this date invoice will be generated and posted as due in student ledger(Due gets created).
- End Date: This date will serve as payment due date, Parents should clear the payments before it. Post this date fee will become overdue & students will start showing in defaulter list.
- Once all required details are filled, click Save.
Important Notes
- After a fee schedule is mapped and fees are collected, it becomes non-editable to ensure accuracy in record-keeping.
- Late payments beyond the due date will automatically classify the student as a defaulter.
- Fees collected under a specific schedule will reflect in reports for that schedule.
Benefits of Fee Scheduling
- Structured Payment Process: Enables timely reminders and organized collection timelines.
- Defaulter Identification: Simplifies tracking of overdue payments.
- Compliance and Transparency: Prevents unauthorized modifications after fee collection.
Video Tutorial :
Was this article helpful to you?
Yes0
No0