Part 1: Create PEN as a Custom Field
Step 1: Navigate to Settings ->Administration -> School Setup.

Step 2: Locate and Click on the Custom Fields.
Step 3: Click the Create button (top-right corner), fill in the required details, and click ADD to save.
For more details on custom field creation, refer to:
👉 [How do I add custom fields?(Updated Flow)]

Part 2: Map the New Field to Student Forms
Step 4: Navigate to Settings -> Student -> Student
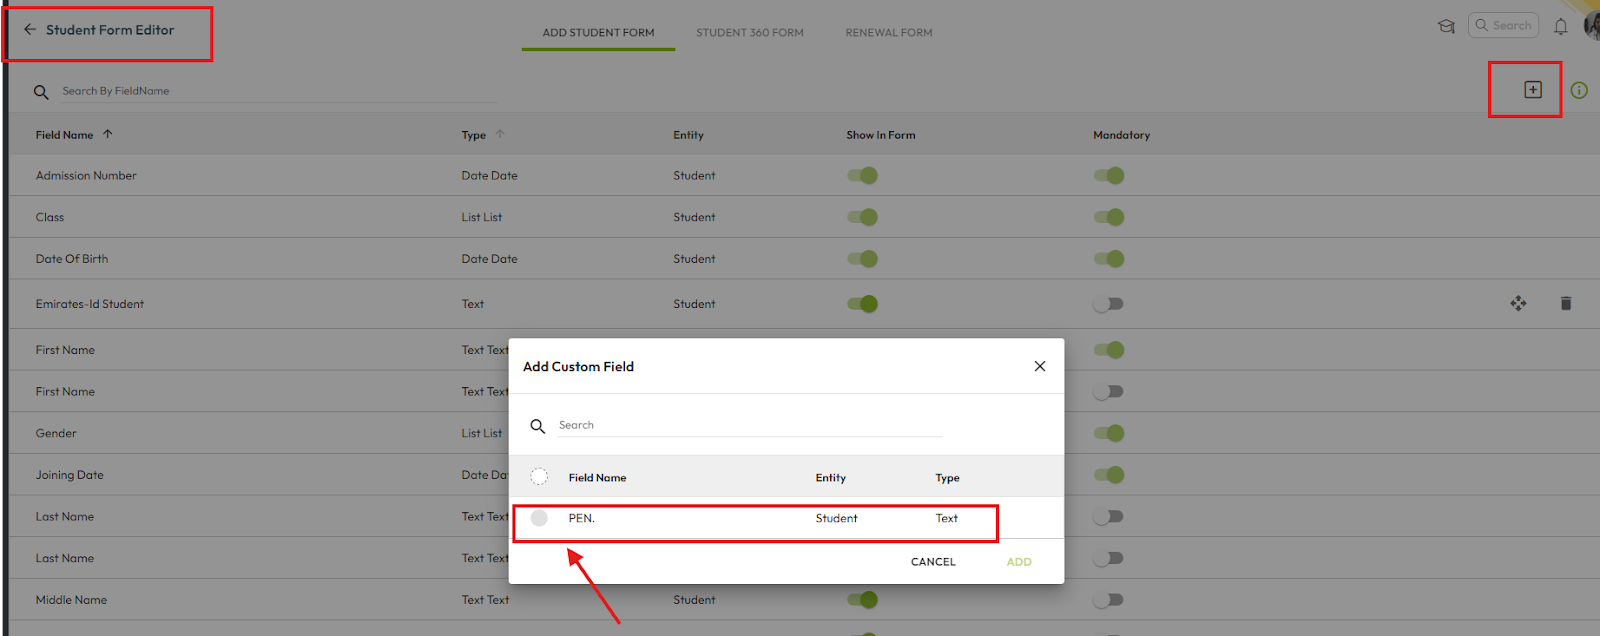
Step 5: Locate and Click on Student Form Editor to map the newly added custom field.
Step 6: Choose the appropriate form to include the PEN field:
- Add Student Form – Allows users to enter the PEN while adding a new student.
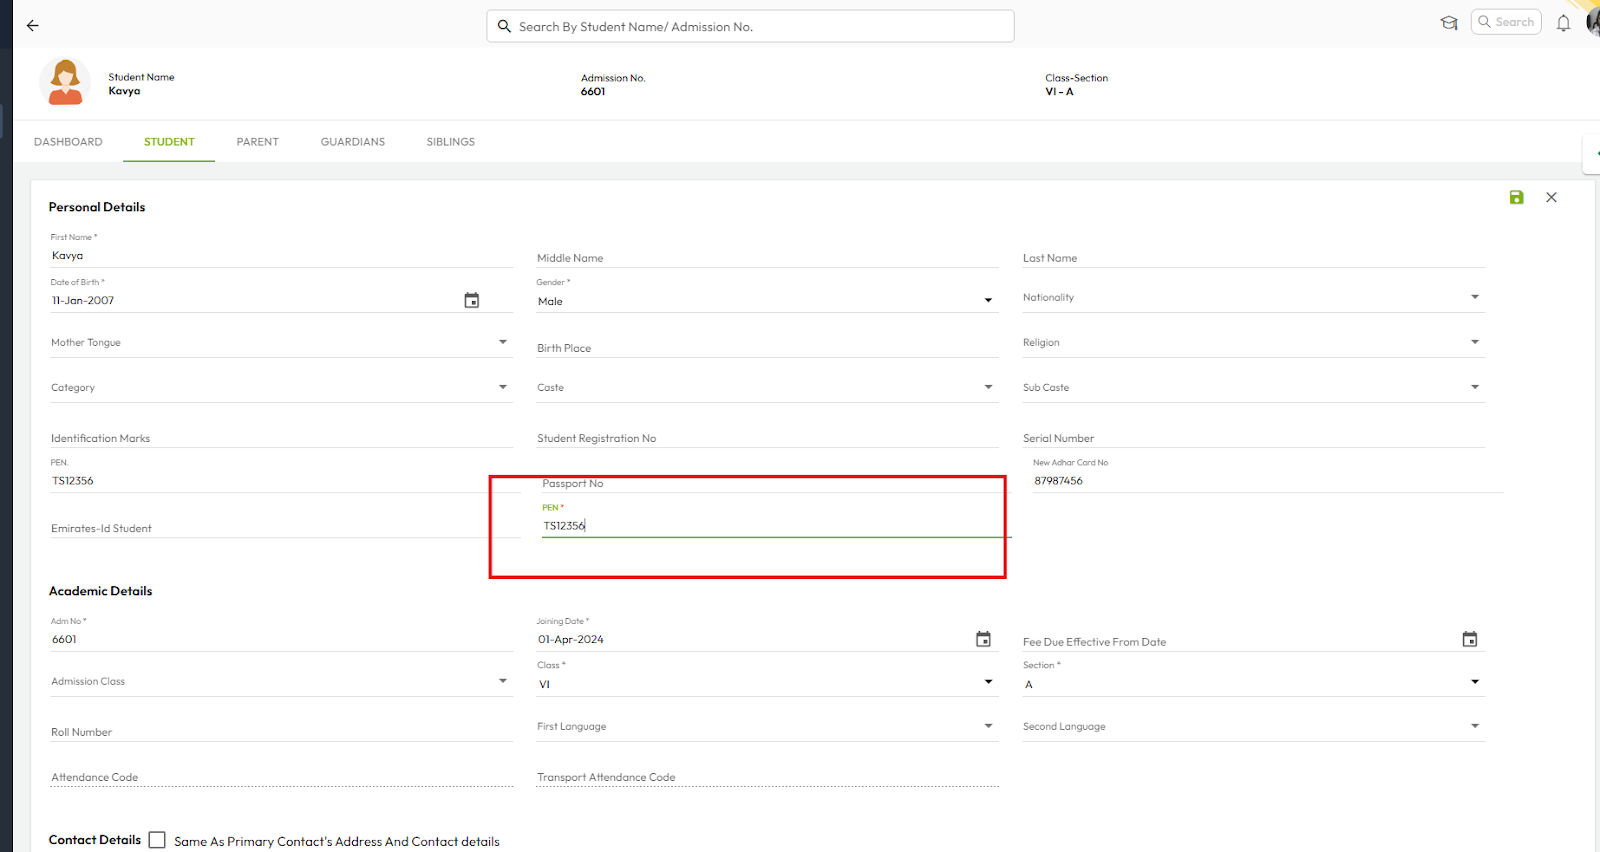
- Student 360 Form – Displays and allows editing/updating of PEN for existing students through student profile/360.
- Renewal Form – Collects PEN details during student/parent renewal form submission.
💡 Recommendation: Map the field in the first two forms for better accessibility.
Part 3: Update PEN Details for Students
Step 7: Update the PEN details using the bulk update template for multiple students.
For more details on using bulk update template for students, refer to:
👉 [How can I update student’s class sections in bulk?]
Part 4: Mapping PEN in the TC Template
Step 8: Before generating the TC, ensure the PEN field has been added to your TC template in NextOS.
For further assistance, contact our support team:
📧 Email: support@nexteducation.in
📞 Toll-free: 1800 200 5566
Step 5: Generate TC with PEN
Step 9: Once all the steps are completed, proceed with TC generation to reflect the PEN details on it.