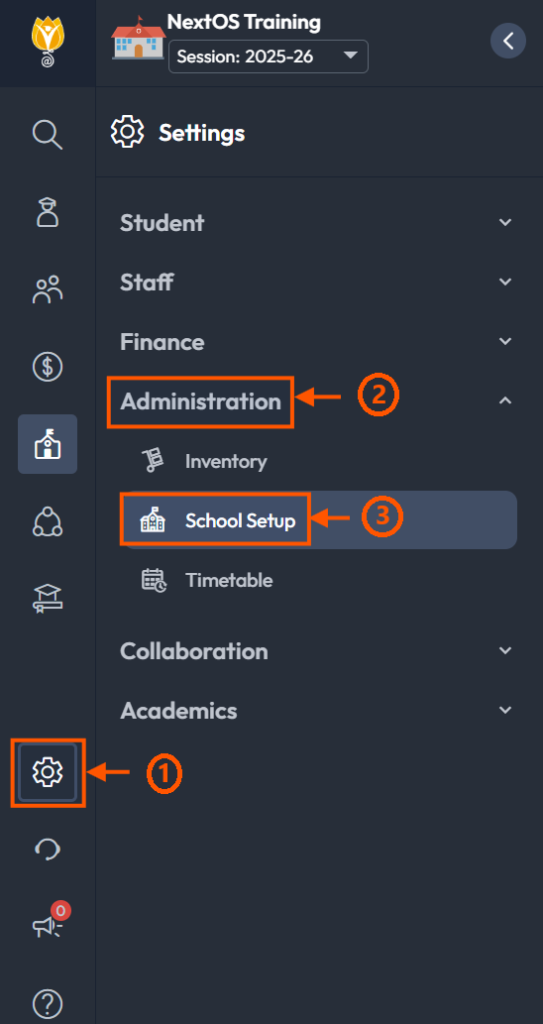
Step 1: Navigate to Settings -> Administration -> School Setup.
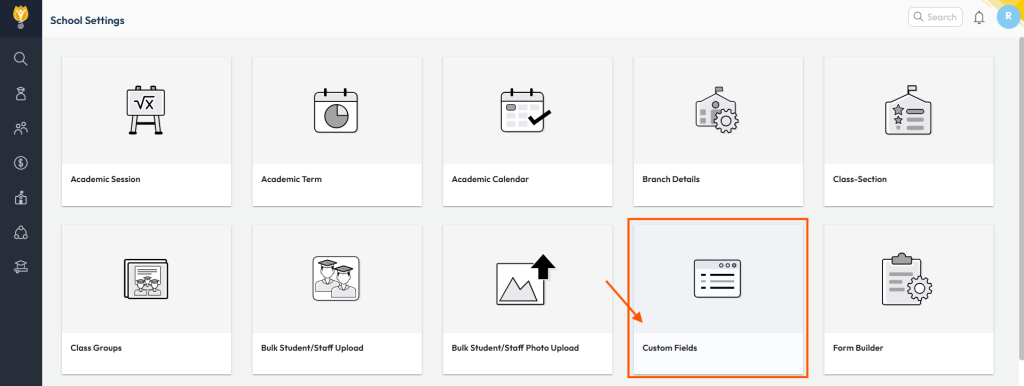
Step 2: Locate Custom Fields and click on it.
Step 3: Click on the Create option in the top-right corner.

Step 4: Update the following required details:
- Header:
This will organize custom fields under a specific header, such as Sports Information or Strength & Weakness.
Note: To group fields together, ensure all new fields are assigned the same header name. - Applicable To:
Select the specific module where these fields will apply.
Example: Select both Admission Student and Student if the field should apply to new applicants as well as confirmed students. - Field Details:
Provide specific details for the new field:- Select Type: Choose from the available options (e.g., Text, List,Checkbox,Multiselect etc.).
Did you know? Text and List are the most commonly used types for custom fields. - Name: Enter the name of the field for which additional information will be collected.
- Label: To enter the description of the field.
- Mandatory: Indicate if the field is mandatory by selecting Yes or No.
- Select Type: Choose from the available options (e.g., Text, List,Checkbox,Multiselect etc.).
Step 5: Click Add to save the new field.
Was this article helpful to you?
Yes4
No2