You can create customized fee reports to view exactly the data you need, in the format that works best for you.
Steps to generate a customized fee report
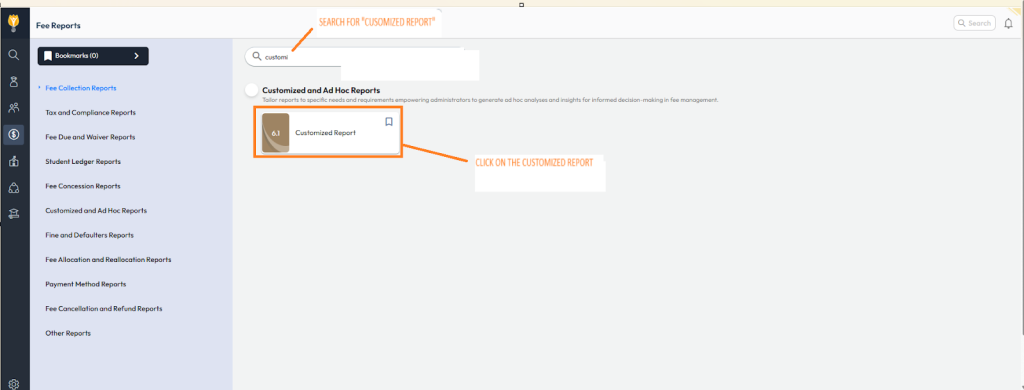
- Navigate to Finance > Fee > Fee Report.
- Select the Customized Report option.
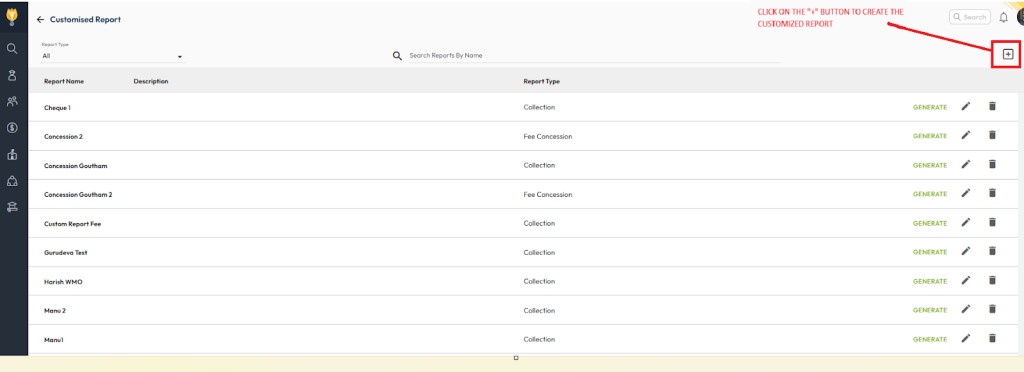
- Click Add Customized Report.
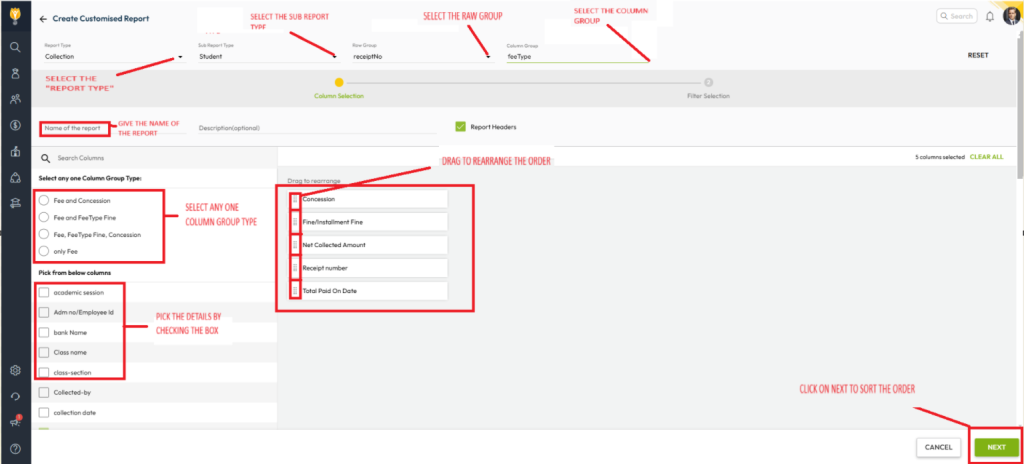
- Choose the required Report Type and Sub-Report Type
– This defines what kind of fee data you want to analyze, such as dues, collections, or defaulters. - Define the Row Group and Column Group
– This controls how data is grouped and displayed, for example student-wise, class-wise, or fee-type-wise. - Enter a Report Name
– Give a clear and meaningful name so the report can be easily identified and reused later. - Select the required Columns
– Choose only the data fields you want to see (such as student name, fee type, due amount, paid amount, etc.). - Rearrange the selected columns using drag and drop.
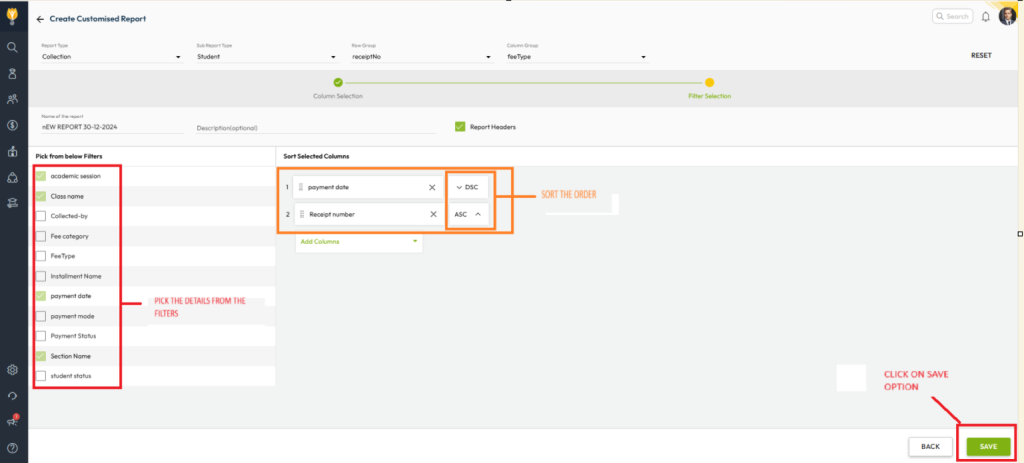
- Apply sorting (ascending or descending) if required.
- Click Save to finalize the report.
Step 1:
Step 2:
Step 3
Step 4
How this helps accountants in day-to-day work
- Customized views: Accountants can create reports specific to dues, collections, defaulters, or audits without extra manual filtering.
- Time saving: Saved report formats allow quick access without recreating reports repeatedly.
- Better clarity: Grouping, sorting, and column arrangement make financial data easy to read and analyze.
- Operational efficiency: Helps track payments, pending dues, and reconciliations more efficiently.
- Improved decision-making: Clear, structured reports support faster issue resolution and better financial planning.
Video Tutorial :
Was this article helpful to you?
Yes0
No0