If you’ve already imported the ready-made course plan from Next Education, you typically won’t need to add additional course-related resources, as it covers daily teaching needs comprehensively. However, if you have your own teaching aids you’d like to include, follow these steps:
- Navigate to: My Workspace > My Courses.
- Select a chapter and then a session.
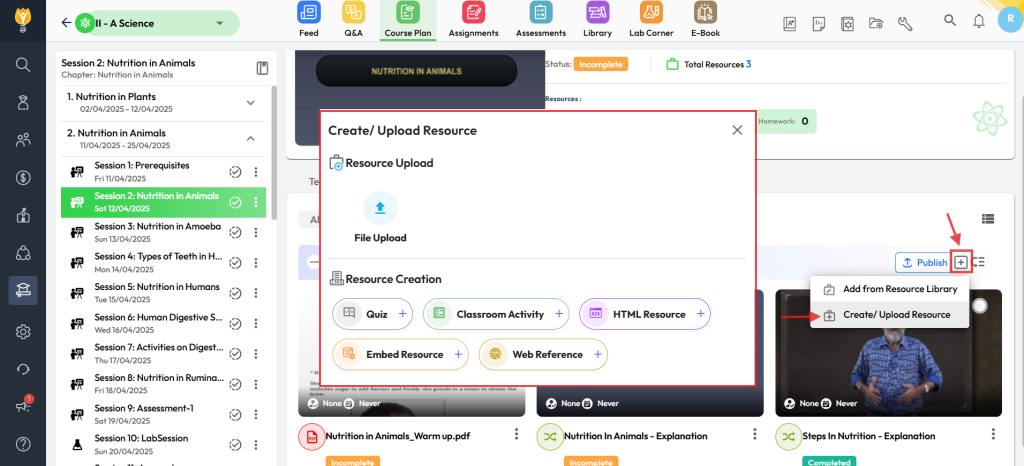
- Go to the Resources tab and click the ( + ) Add Resources button.
- Choose Create / Upload Resources, and select your preferred method.
- Upload Resource: Upload images, PDFs, Word documents, PowerPoint presentations, MP3s, or MP4s.
Note: SCORM packages can also be uploaded here. - Quiz : Allows you to create quizes using Self/Next Education questions. These can be published as a session resources to assess the children’s understanding.
- Classroom Activity: Design custom activities by defining resource requirements, preparation steps, teacher role, notes, and more.
- HTML Resource: If you maintain teaching materials in HTML format, use this option to publish them.
- Embed Resource: Embed resources from external platforms like Google Drive & One drive (e.g., documents, PPTs, Excel files, or videos).
- Web Reference: Link educational videos from platforms such as YouTube, Khan Academy, and others.
- Upload Resource: Upload images, PDFs, Word documents, PowerPoint presentations, MP3s, or MP4s.
- After adding the desired resources, click Submit / Save to include them in the session.
- Publish the resources to all students or specific groups as needed.
- Choose a Chapter, and select a session > Go to Resources tab > Locate and Click (+) Add resources button.
Was this article helpful to you?
Yes3
No0