To assign a fee category to a student during the admission process, you must first ensure that the necessary fee configurations are set up in the system.
Pre-requisites: Configure Fee Settings
Go to Settings > Finance > Fee Module and set up the following:
- Fee Category: e.g., Day Scholar, Day Care, General, RTE, etc.
- Fee Types: e.g., Admission, Tuition, Security Deposit, Subject Fees, etc.
- Fee Schedule: e.g., Monthly, Quarterly, Annual, etc.
- Fee Structure: Define the amounts and installment breakdown for each fee type.
- Fee Autonumbering: Configure for Main Fee Receipt.
- Fee Receipt Template: Assign the appropriate template.
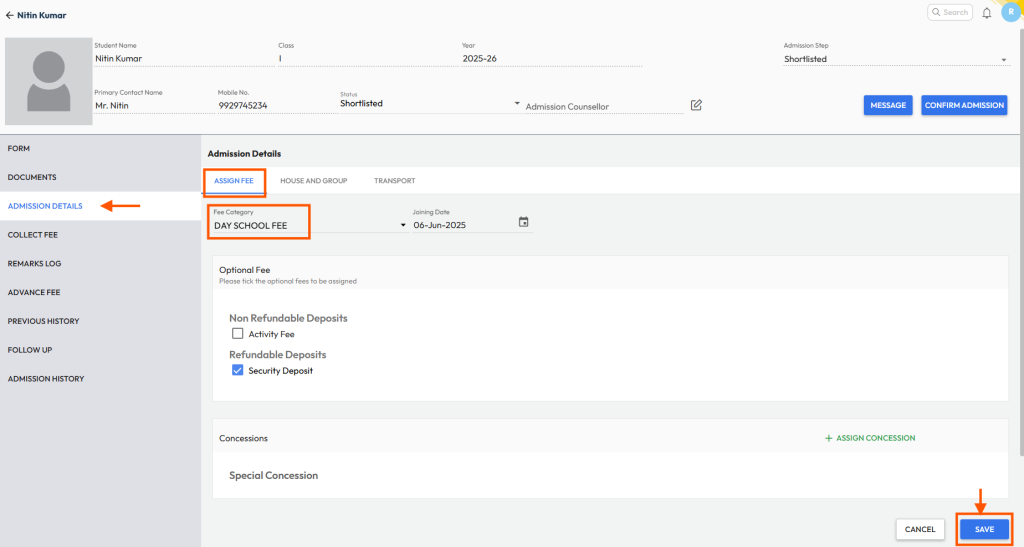
Assigning Fee Category During Admission
- Navigate to Student > Admissions > Manage Admission
- Go to the Confirmation tab to view the list of shortlisted students.
- Click on the student’s name to open their detailed profile.
- In the profile, scroll to the Admission Details section.
- Under Assign Fee, click on Fee Category and select the appropriate category.
- Click Save to apply the changes.
Note: You can also assign Optional Fees & Concession from the same section if required.
Tip: You can immediately collect the fee from the student after assigning the fee category.
Was this article helpful to you?
Yes0
No0